Administration#
The admin section is accessible to superadmins only and is reachable from the sidebar. It covers five areas: organisations, departments, users, access management, and settings.
Data model#
The LEAF Portal uses a three-level hierarchy for organising data access:
Organisation
  └── Department
        └── Entity  (individual sensor / device)
Access to sensor data is controlled through access grants (managements), which bind a user to a scope within this hierarchy.
Organisations#
URL: /admin/organisations
Organisations are the top-level tenants — typically an organisation, company, or research group. Each department belongs to exactly one organisation.
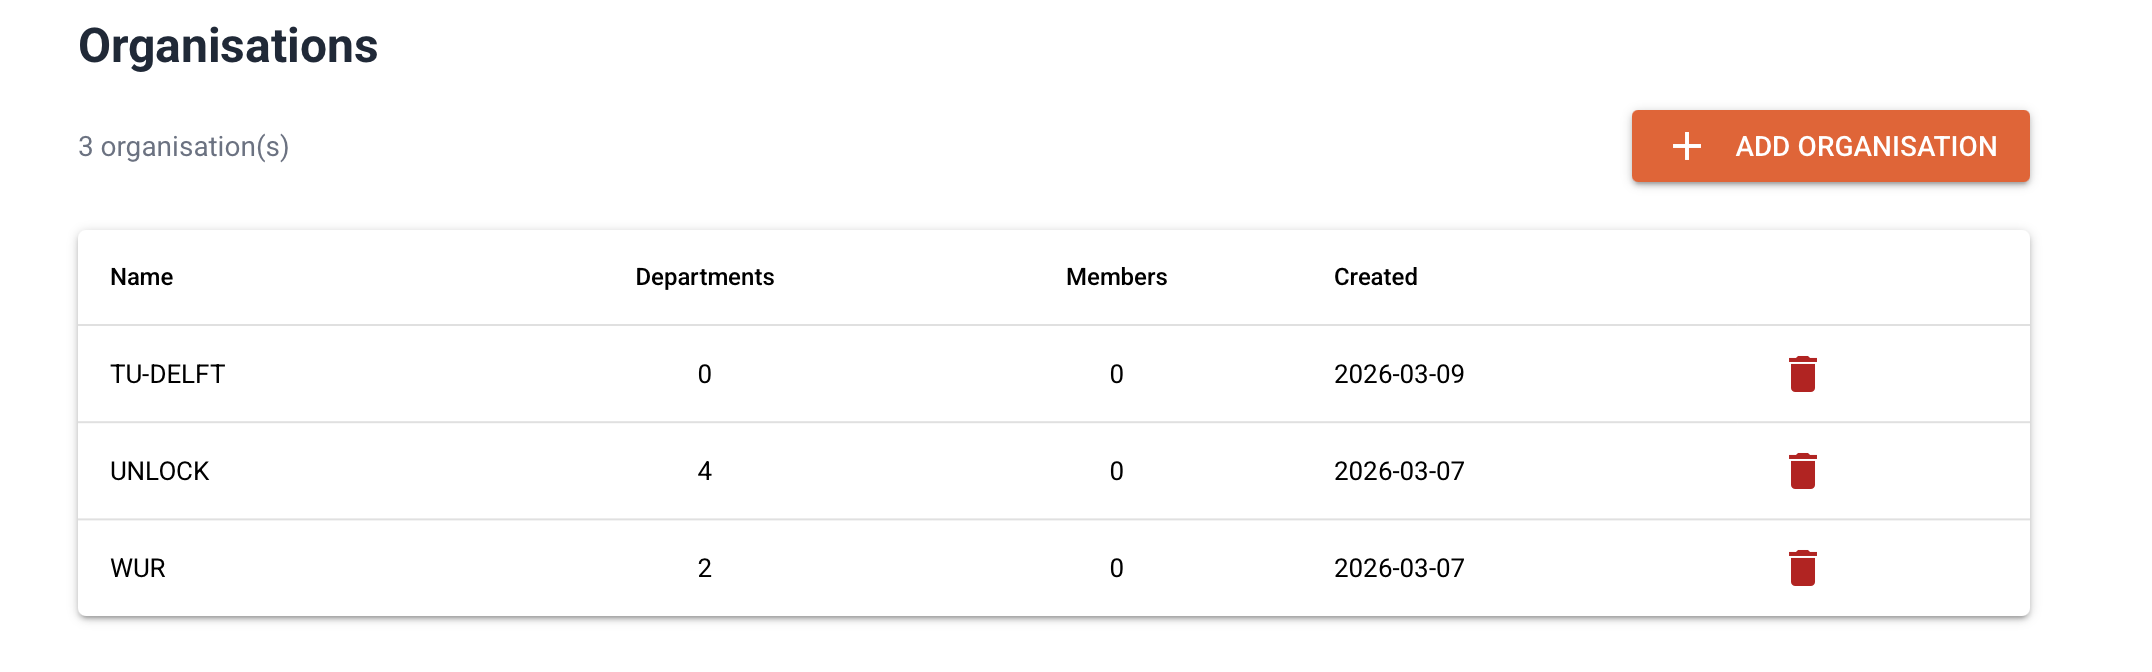
Creating an organisation#
Click Add organisation.
Enter a unique name.
Click Save.
Deleting an organisation#
An organisation can only be deleted if it has no departments. Remove all departments first.
Departments#
URL: /admin/departments
Departments are subdivisions within an organisation. Sensor data is always tagged with a department.
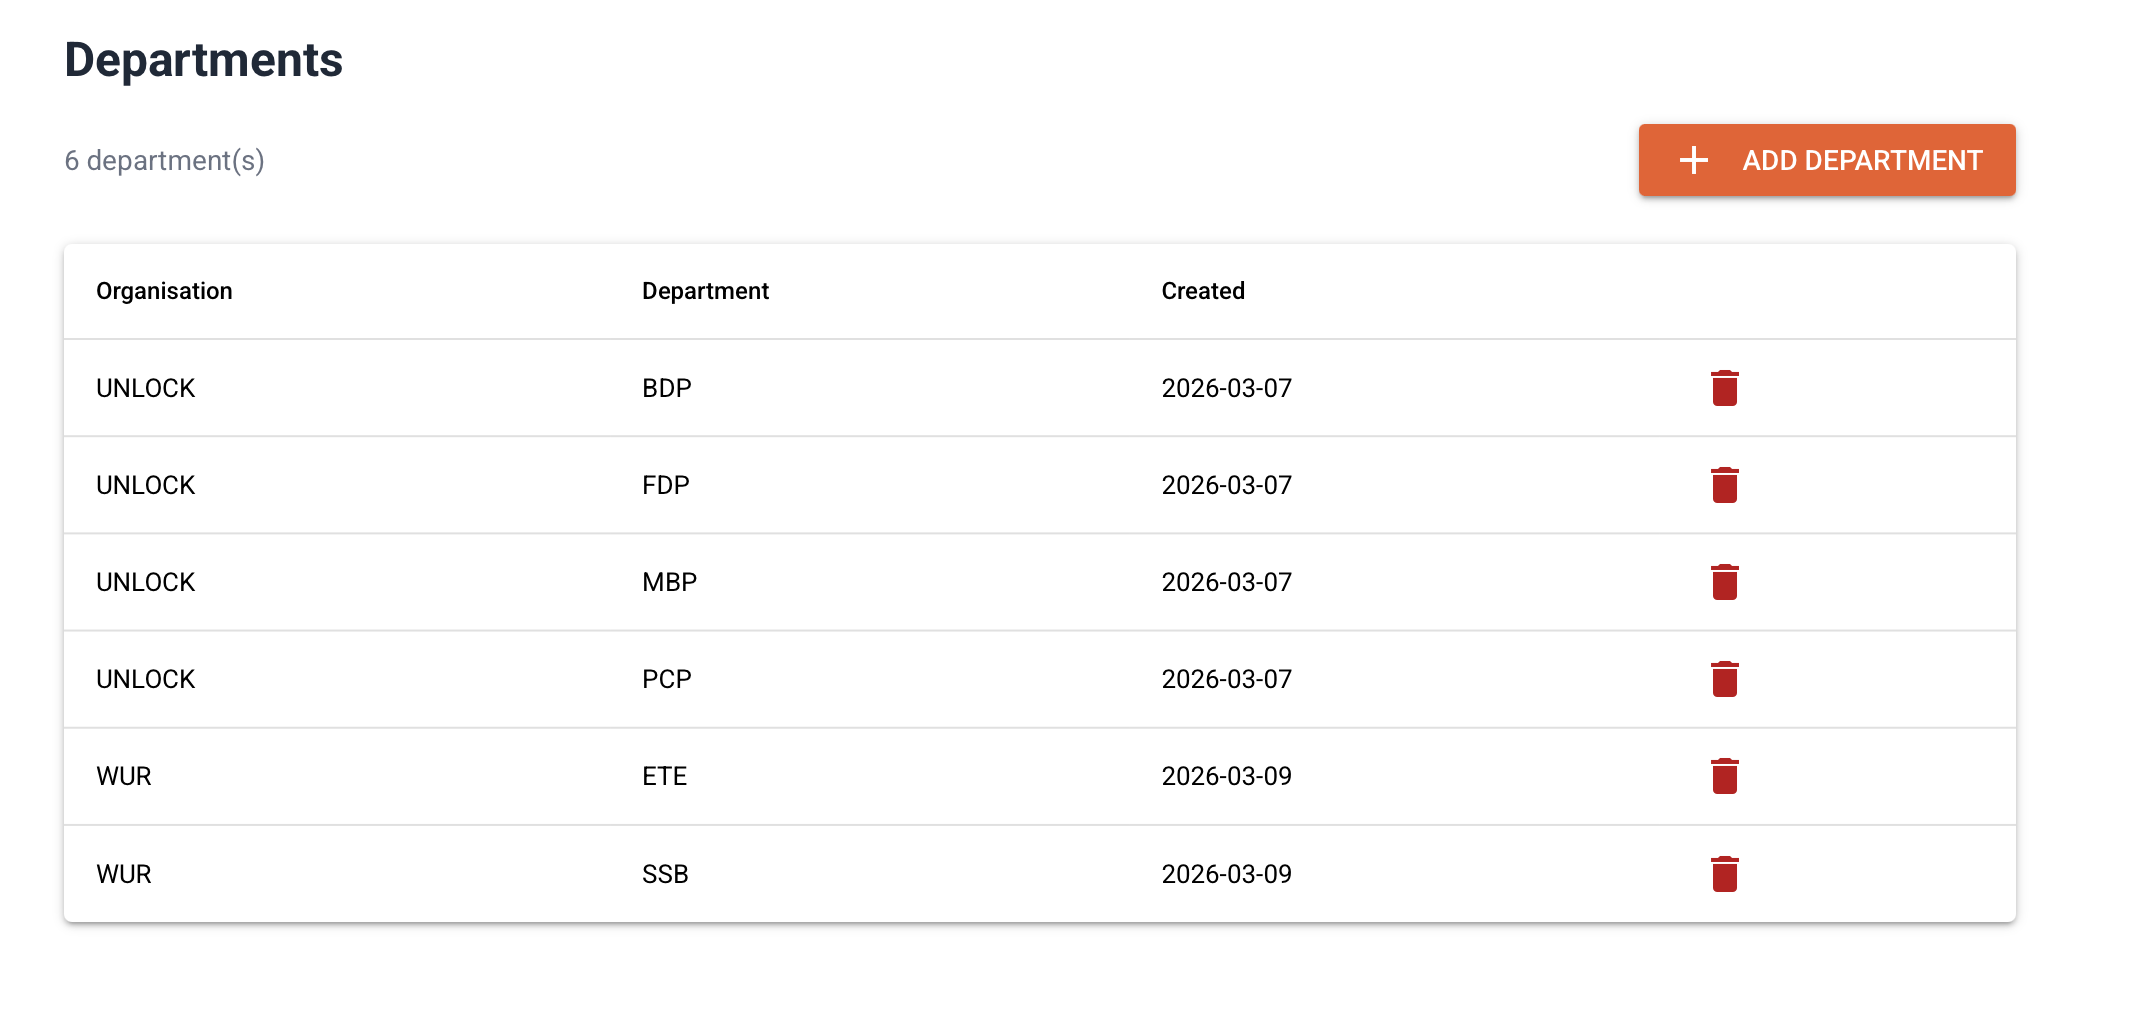
Creating a department#
Click Add department.
Select the parent organisation.
Enter a name (unique within the organisation).
Click Save.
Department members#
Click the members icon on a department row to manage which users are associated with that department. Department membership is used for alarm rule ownership and portal UI filtering — it does not by itself grant data access (see Access Management below).
Users#
URL: /admin/users
User accounts can be created, edited, and deleted here. Each user has a name, email address, and password.
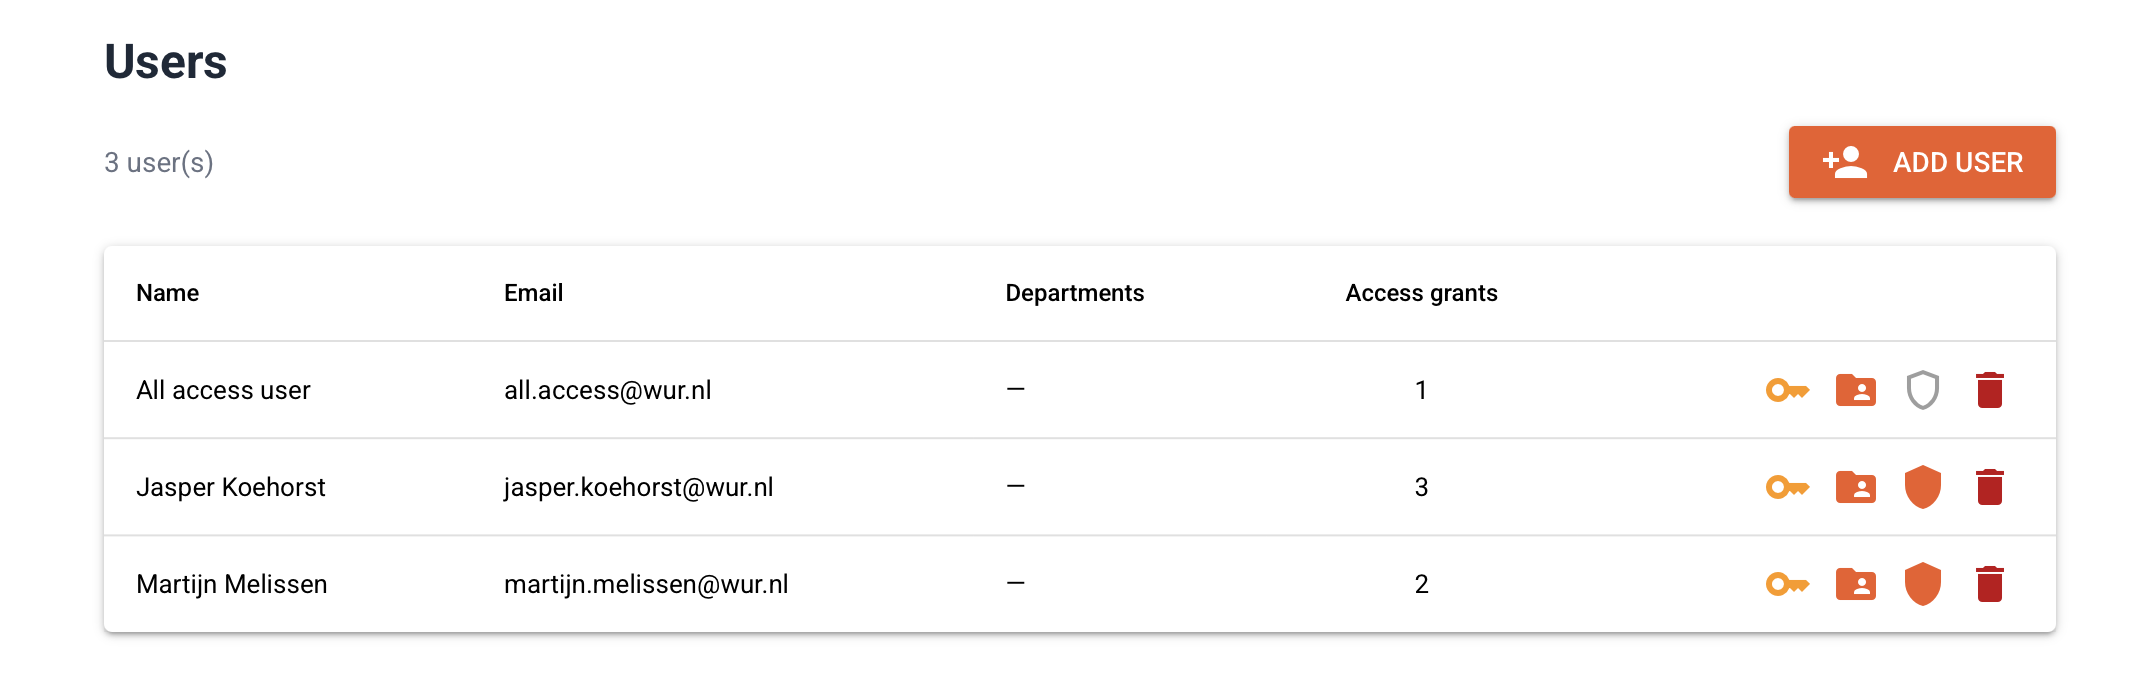
Creating a user#
Click Add user.
Fill in name, email, and password.
Optionally tick Superadmin to grant full admin access.
Click Save.

Resetting a password#
Click the edit icon on a user row and enter a new password.
Users can also reset their own password via the forgot-password link on the login page, provided SMTP is configured in Settings.
Access Management#
URL: /admin/access-management
Access grants (called managements) define what sensor data a user can see. A management is a named scope with optional filters:
Field |
Meaning |
|---|---|
Organisation |
Which organisation’s data is included |
Department |
Restrict to one department (optional) |
Entity |
Restrict to one entity / sensor (optional) |
Time start |
Only data from this timestamp onwards (optional) |
Time end |
Only data up to this timestamp (optional) |
Leaving a field empty means no restriction at that level. For example, a management with only an organisation set gives the user access to all data in that organisation across all departments.
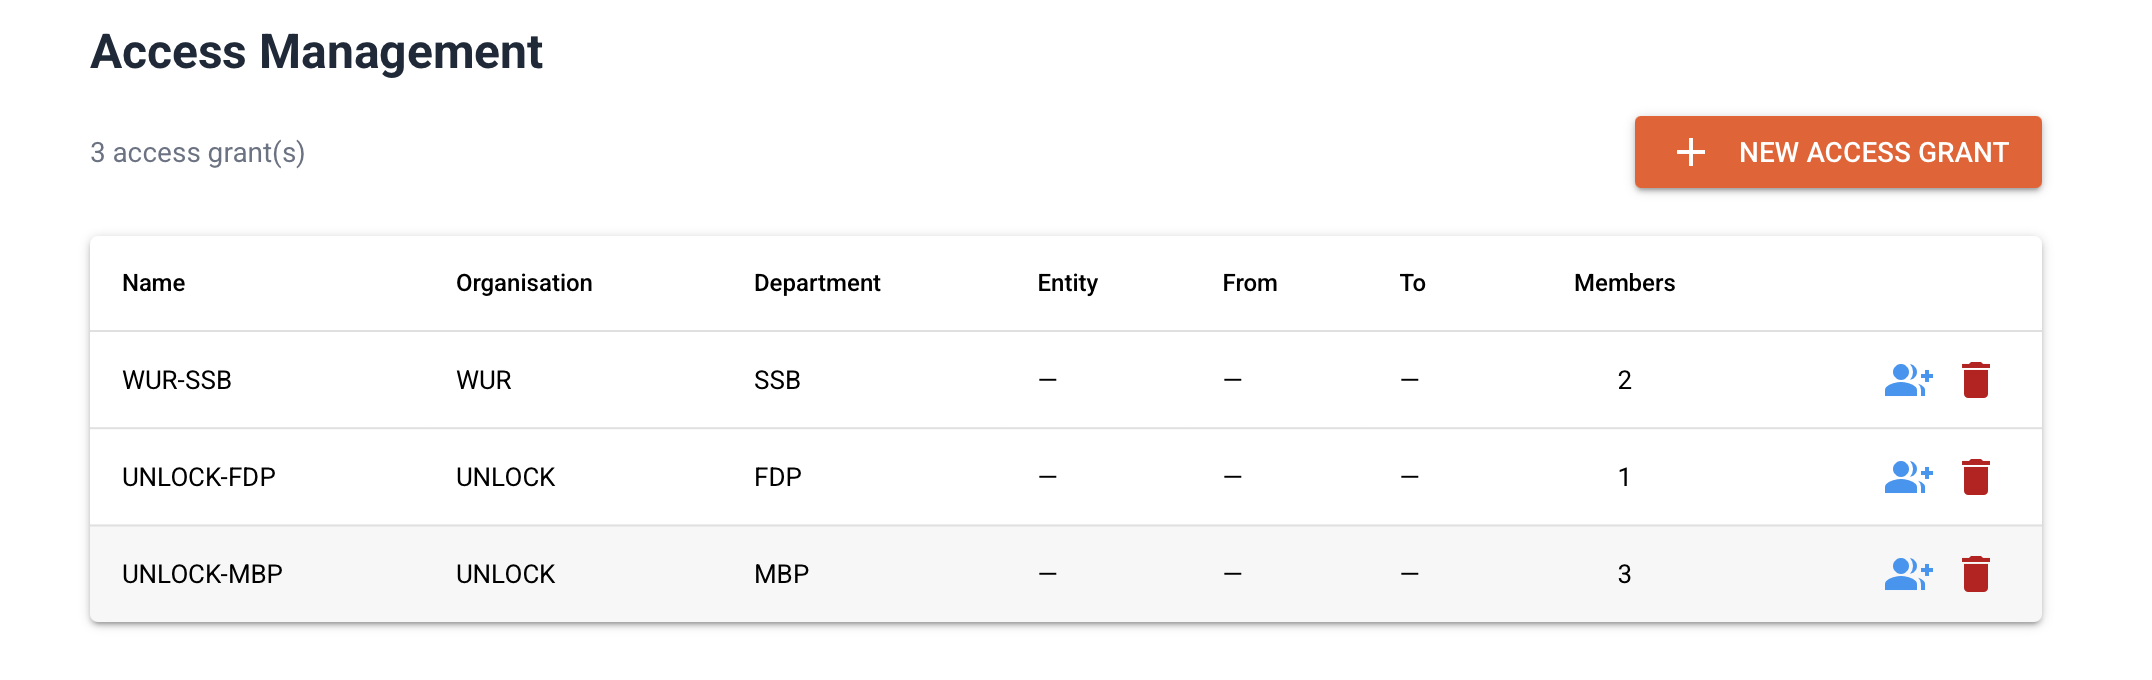
Creating an access grant#
Click New access grant.
Enter a descriptive name.
Select the organisation and optionally narrow the scope.
Click Save.
Open the grant and add users to it via the members button.
Example scopes#
Use case |
Organisation |
Department |
Entity |
|---|---|---|---|
Full organisation access |
WUR |
— |
— |
Single department |
WUR |
SSB |
— |
Single entity |
WUR |
SSB |
R1 |
Settings#
URL: /admin/settings
Database#
Reconnect the portal to a different TimescaleDB instance without restarting. Enter the new connection details and click Save & reconnect. The new credentials are also written to the .env file so they persist across restarts.
Field |
Example |
|---|---|
Host |
|
Port |
|
User |
|
Password |
Database password |
Database |
|
Mail (SMTP)#
Configure the outgoing mail server used for alarm notifications and password reset emails.
Field |
Example |
|---|---|
Host |
|
Port |
|
User |
|
Password |
SMTP password |
From |
|